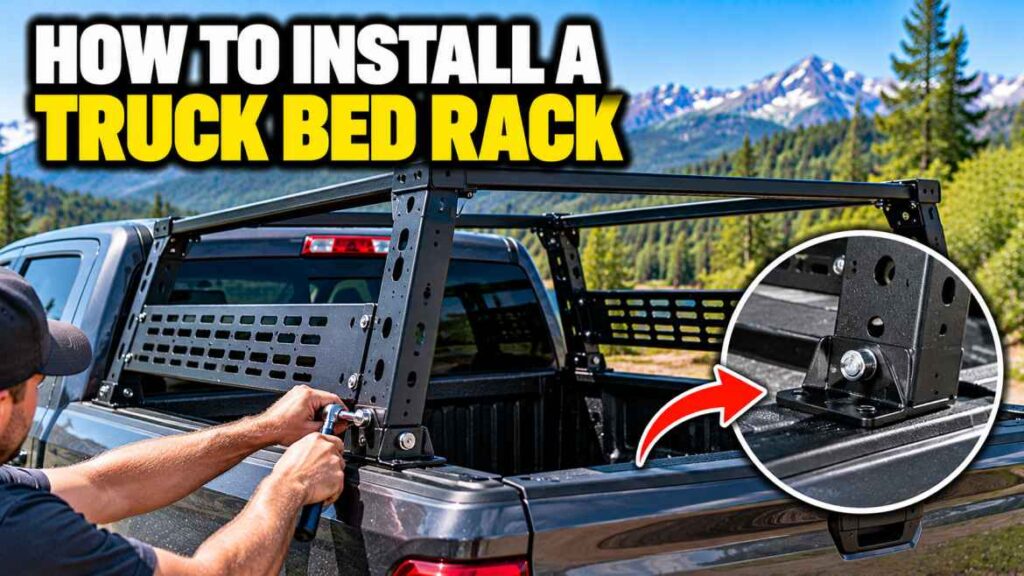
Installing a truck bed rack is usually straightforward when the rack is designed for your pickup and the mounting points are accessible. The important part is not simply getting the uprights onto the truck; it is aligning the system correctly, tightening the hardware as specified, and confirming that the finished rack can safely carry its intended load.
The general process is to confirm truck and rack fitment, inspect the bed and mounting surfaces, assemble the rack loosely, position the uprights, align the crossbars or platform, install the clamps or bolts, tighten and torque the hardware according to the manufacturer’s instructions, and perform a final clearance and load check. Installation varies substantially between bed-rail clamps, factory-track systems, and drilled mounts, so the rack’s manual always takes priority.
Before Installation
Confirm the rack is made for your exact truck and bed configuration. Check model year, bed length, rail system, liner, tonneau cover, toolbox, and other accessories.
Read the manual before assembling the rack. Some products are designed for tool-free clamping; others use bolts and require a specified torque. Yakima lists a 30-minute installation for its BedRock HD system, but installation time varies by product and vehicle.
Tools You May Need
- Socket or wrench set
- Hex or Torx keys if specified
- Tape measure
- Torque wrench when the manufacturer provides torque specifications
- Soft protective pads or shims when specified
- Gloves and eye protection
- A helper for large or heavy rack components
Do not substitute fasteners or omit supplied washers, shims, or protective pads.
Step-by-Step Installation
1. Prepare the bed
Clean the mounting surfaces and remove loose debris. Inspect the bed rails for damage and confirm that existing accessories will not interfere.
2. Identify front and rear positions
Rack manuals often specify which uprights belong at the front and rear. Follow those markings rather than assuming the pieces are interchangeable.
3. Assemble the rack loosely
Install the crossbars or platform while leaving enough play for final alignment. Fully tightening one side too early can make the opposite side difficult to square.
4. Position the uprights
Place each upright at the specified mounting location. Use supplied shims or pads where the manual calls for them to protect the truck and create the intended fit.
5. Install clamps or mounting hardware
Attach the rack to the bed rails, factory tracks, or approved mounting points. Keep the hardware slightly loose until the rack is aligned.
6. Square the rack
Measure the front-to-rear position and crossbar alignment on both sides. Make sure the rack is centered as specified and that the uprights are not twisted.
7. Tighten in the specified sequence
Use the manufacturer’s sequence and torque values. If no torque value is given, do not invent one; follow the supplied tightening instructions.
8. Recheck after tightening
Clamps can shift the rack as they seat. Recheck alignment and hardware after all fasteners are tight.
Different Mounting Systems
| Mounting method | Installation focus |
|---|---|
| Bed-rail clamp | Correct rail position, clamp contact, protective pads |
| Factory track | Correct track hardware and clamp spacing |
| Fixed bolt mount | Exact mounting points and manufacturer drilling instructions |
| Accessory-specific mount | Compatibility with tonneau, toolbox, or other equipment |
Thule’s installation instructions for certain truck applications specify clamp placement and a torque value, illustrating why rack installation should be treated as product-specific rather than a universal procedure.
Torque and Hardware
Use the hardware supplied with the rack. Washers, lock washers, shims, and brackets are part of the engineered connection.
If the manual gives a torque specification, use a suitable torque wrench. Do not substitute a generic “tight enough” standard. Over-tightening can damage threads or bed components, while under-tightening can allow movement.
Final Clearance Checks
Before loading anything, check the rack against the cab, bed, tailgate, antenna, rear window, tonneau cover, toolbox, and other accessories. Also check overall vehicle height if the rack is tall enough to approach garage or parking clearance limits.
Open and close the tailgate and any tonneau cover through their intended range. Do not assume a rack and cover are compatible just because both fit the same truck.
Final Load Check
Verify the rack’s applicable load rating and the truck’s payload limit. Some rack manufacturers publish different on-road and off-road ratings. Use the rating that matches how the truck will actually be used.
Remember that the rack itself, mounts, accessories, and cargo all contribute to the load. Secure cargo with the rack’s intended tie-down points and compatible mounts.
Common Installation Mistakes
- Using the wrong truck-specific fit kit.
- Fully tightening one side before aligning the other.
- Omitting protective shims or washers.
- Guessing torque values.
- Ignoring interference with a tonneau cover or toolbox.
- Loading the rack before checking every fastener.
- Using an on-road load rating for off-road use.
For product-selection context, see our Best Truck Bed Racks guide.
Frequently Asked Questions
Can I install a truck bed rack myself?
Many systems are designed for owner installation, but the difficulty depends on size, weight, mounting method, and truck configuration.
Do truck bed racks require drilling?
Not necessarily. Many use clamps or factory tracks, while some systems require fixed mounting. Check the exact instructions.
Do I need a torque wrench?
If the manufacturer specifies torque, a torque wrench is the best way to achieve it accurately.
Can I install a rack over a tonneau cover?
Only when the rack and cover are specifically compatible. Some systems require dedicated kits or occupy the same mounting space.
After Installation: What to Check
Do not treat tightening the final fastener as the end of the installation. Open and close the tailgate, check the rack against the cab and bed, and confirm that any tonneau cover or toolbox still operates as intended.
Push gently on the rack by hand to check for unexpected movement. A small amount of normal flex can differ from loose hardware; if you can see a clamp moving against the bed, stop and inspect the installation.
Recheck After the First Trip
After the first loaded trip, park safely and inspect the mounting points again. Some systems settle slightly as clamps seat. Follow the manufacturer’s instructions for any required re-tightening rather than automatically increasing torque.
Installing Accessories After the Rack
Adding a kayak mount, bike carrier, cargo basket, tent, or other accessory can change the load and clearance calculations. Confirm that the accessory is compatible with the rack and that its own weight is included in the total load.
Bottom Line
A good truck bed rack installation is a fitment and alignment job, not just a tightening job. Confirm the application, assemble loosely, square the rack, use the correct hardware and torque, then verify clearance and load limits before carrying gear.